Neural Network from Scratch
A tutorial on the basics of neural networks and how to make one yourself from scratch.
Today I'm going to walk you through building a simple neural network from scratch. If you're new to this, don't worry, there is no prior knowledge required. If this is your first step into the world of AI, welcome :) If you already know a bit about the field, I hope this deepens your understanding of the mechanisms behind neural networks.
Today we'll be training a model to identify and classify handwritten digits using the MNIST dataset. This is a very famous dataset in machine learning, consisting of 60,000 labelled images of handwritten digits 0 to 9. We're going to train a model to correctly label digits as it sees them, with over 90% accuracy! Are you ready? Let's begin!
Firstly, what is a neural network?
A neural network is exactly what it says on the tin: it's a network of neurons. A neuron, in this context, is essentially a function. It takes a numerical input, applies some operations to it, and spits out a numerical output. For a simple neuron there are three parameters to consider; the weights (W), the bias (b) and an activation function (f).
Weights are scalar numbers we multiply our inputs by to scale them in some way. We initialise them pseudo-randomly, and the machine learns to optimise them as it goes along. They essentially emphasise the more important inputs and minimise the effect of less important ones.
The bias controls how "trigger happy" the neuron is. Changing it affects how biased the neuron is towards high or low activation values.
The activation function "squishes" the output into a certain range to make it more useful for the next stage. Common choices are sigmoid, which squishes values into $[0,1]$, and ReLU, which makes all values $\geq 0$.
A neural network is then just a network comprised of "layers" of these neurons. At each layer, the output from the previous layer is passed forward as input to the next. We can have as many layers and neurons as our heart desires. Too few and the model struggles to learn, too many and it becomes slow and difficult to train. Right, now that you know what a neural network is, let's build one!
The Program
We'll only be using three Python libraries for this project: NumPy for basic maths and linear algebra, Pandas to read and set up dataframes, and Matplotlib to graph and display our images.
Data Preparation
The data is imported as a Pandas dataframe. It's separated into labels (y) and pixel values (x). The x values are normalised into $[0,1]$ and the y values are one-hot encoded (converted to binary indicator vectors). Finally, the data is split into a training and a test set. An 80/20 split is used here.
Neural Network Structure
This will be quite a simple network. We'll have an input layer of 784 neurons (one per pixel), an output layer of 10 neurons (one per digit label), and a hidden layer of 32 neurons where the magic happens. The number of hidden neurons was chosen completely arbitrarily, I just happen to like the number 32. Feel free to mess around with different numbers and see how it affects performance.
Visualising the Data
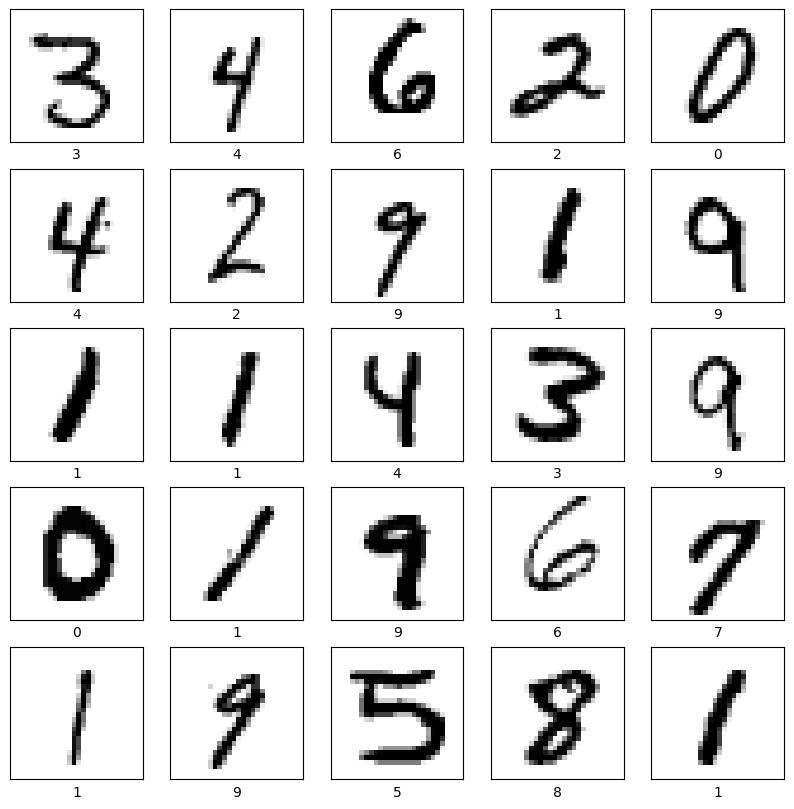
It's no fun training an image classifier if we don't get to see the images! Let's take a look at some of the digits from our dataset. I don't know about you, but I think I'd struggle to classify some of these!
Initialising Weights & Biases
Before we begin training, we must initialise the weights and biases. Here I'm just initialising the weights randomly and setting the biases to zero. There are more sophisticated initialisation methods, but they're outside the scope of our simple example.
Activation & Loss Functions
This model uses ReLU and softmax activations with cross-entropy loss. ReLU (Rectified Linear Unit) simply clamps negatives to zero, while softmax turns the output layer into a vector of probabilities:
For the loss, two common choices for a classification task like this are Mean Squared Error and Cross-Entropy:
Both involve transforming our labels into a one-hot vector; a vector of all zeros except for a single 1 in the entry corresponding to the correct label. We'll use cross-entropy, as its derivative simplifies very nicely and makes life easy for us later. The accuracy metric simply tracks the proportion of correct guesses the model makes.
Forward Propagation
The first step in training is the forward pass. This involves feeding an image into the network and letting the information flow all the way through, layer by layer. At each layer we compute the weighted sum of the inputs (plus bias), then feed that through our activation function to get the next activations:
The first hidden layer uses ReLU; the output layer uses softmax, turning the final layer into a vector of probabilities. We then read off the model's guess as whichever digit it assigned the highest probability. Here's the implementation:
Backpropagation & Gradient Descent
Since we initialised the weights at random, our first forward pass is nothing more than a terrible guess. We need a way to adjust these weights and biases to "train" the model, and that's where backpropagation comes in.
Backpropagation is the way this network actually "learns". It's an algorithm for iteratively updating the weights and biases after each forward pass. More technically, it's an autodifferentiation method that calculates the gradient of the loss function with respect to the weights and biases, then updates each parameter by subtracting that gradient, scaled by a learning rate.
Gradient descent is the method for minimising the loss. You can imagine it as a person walking down a foggy hill: the height of the hill is our loss, so we want to get as far down as possible, but we can't see far ahead. We have to descend iteratively, one step at a time. Gradient descent tells us the direction of our next step, and the learning rate $\alpha$ decides how big that step is.
For each layer, starting from the output and working backwards, we compute the gradients. With softmax + cross-entropy, the output error simplifies beautifully:
We then propagate that error back to the previous layer, using the derivative of its activation function:
Finally, we update every parameter by taking a step downhill, subtracting each gradient scaled by the learning rate:
One drawback of gradient descent is that computing all these gradients across the whole network can be very slow. So we'll use a variant called mini-batch gradient descent, which randomly samples small subsets of the data and performs descent on those. It's less precise, but far faster and the accuracy trade-off is smaller than you'd think.
Training the Network
Here we define the training function. It takes the x and y data along with the learning rate, batch size and number of epochs. It then iterates over the epochs, performing mini-batch gradient descent and printing the loss and accuracy at each step.
Testing the Model
Now that we've trained the model, we need to test it on the data we set aside at the start. This is crucial as it tells us how well the model performs on images it has never seen before. We don't want a model that aces its training data but is useless on new images (that's called overfitting, and we want to avoid it). So, let's see how well it learned!
Test accuracy of over 90%, our model is a success! It generalised very well from the training data and can correctly classify new, unseen images. Now let's look at some of the numbers it got wrong, which can give us insight into the patterns the model may be picking up on.
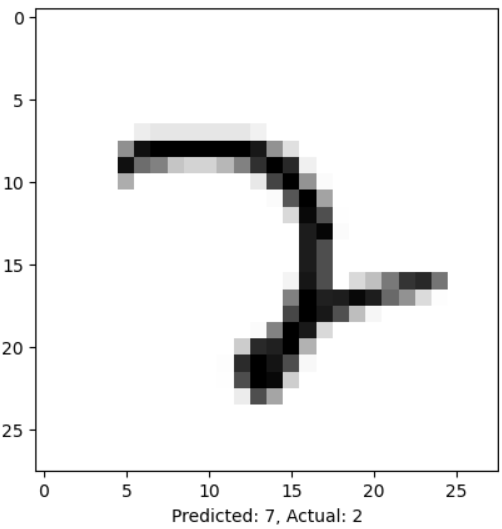
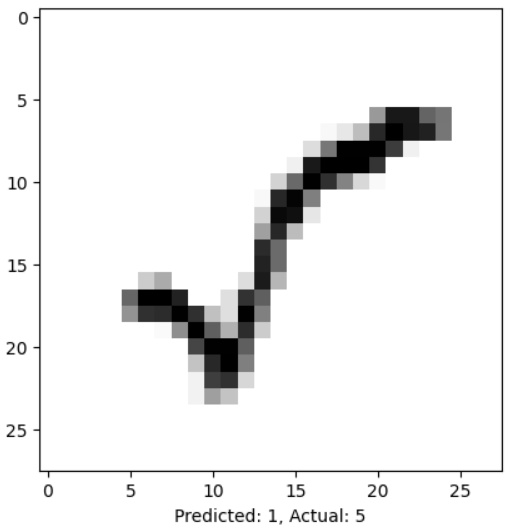
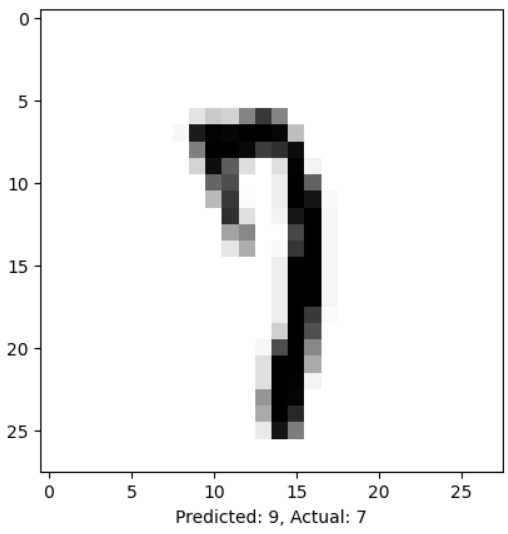
Looking at some of the ones our bot misclassified, I almost feel bad for it. I'm not sure I'd have gotten some of those right either!
So that's that! We successfully built a bot from scratch that recognises handwritten digits with over 90% accuracy. I hope you enjoyed our little experiment and learned something interesting. Now you can tell all your friends you know how to build a neural network from scratch! If you thought this was cool, I highly recommend going through the code and messing with the parameters. Try adding another layer, and see if you can push it to 95% accuracy.
You can find the Python script on my GitHub, or the full notebook with all this code and explanations on Google Colab. The only way to truly learn something is by doing it yourself!
This project was really fun to make. I was learning about neural networks in my degree at the time, and this seemed like an excellent way to test my understanding of the core concepts. I hope you enjoyed it, and I look forward to more similar projects in the future :)